VPC with Public and Private Subnets and Hardware VPN Access
Description:
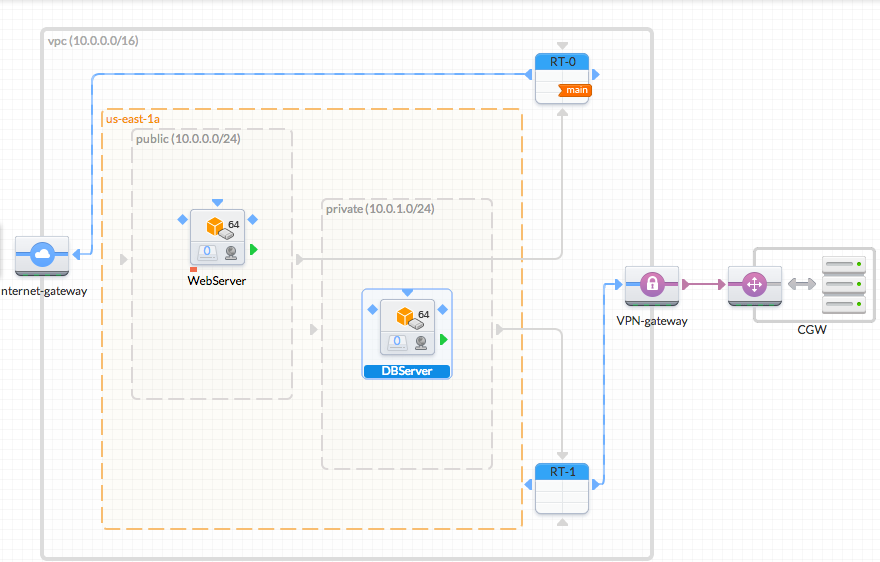
The configuration for this scenario includes a virtual private cloud (VPC) with a public subnet and a private subnet, and a virtual private gateway to enable communication with your own network over an IPsec VPN tunnel. We recommend this scenario if you want to extend your network into the cloud and also directly access the Internet from your VPC. This scenario enables you to run a multi-tiered application with a scalable web front end in a public subnet, and to house your data in a private subnet that is connected to your network by an IPsec VPN connection.
The following diagram shows what we will create in this example:

Steps:
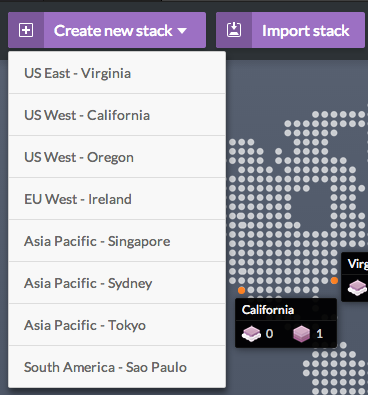
- Create a new VPC Stack, in the region of your choice:
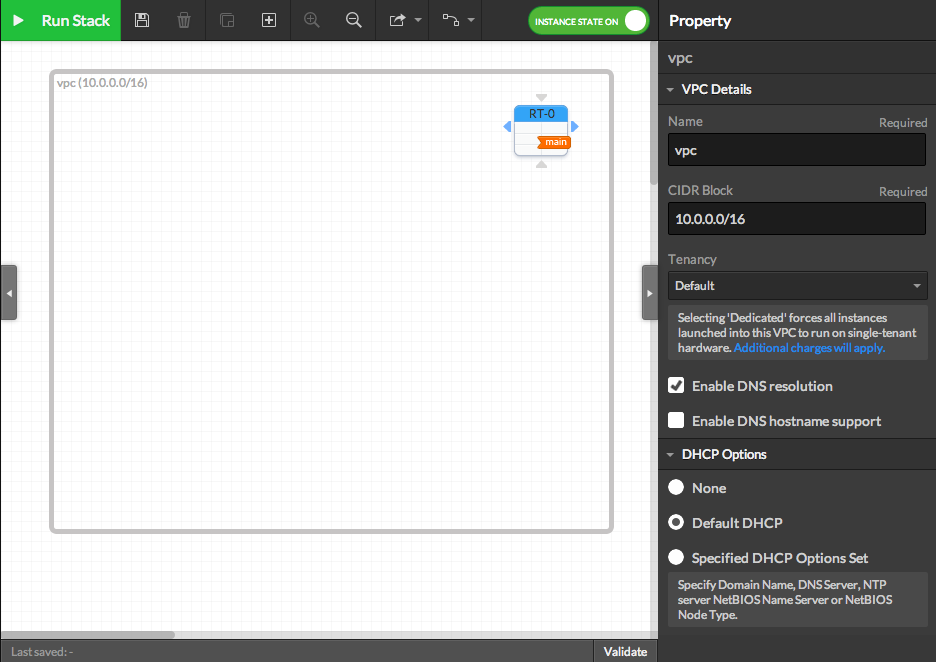
- A default VPC is created when you create a new VPC Stack, as well as a default Route Table.
You can optionaly edit the subnet details in the right panel (don't forget to focus on the subnet by clicking on its blank area). The network address must be written following the CIDR notation:
- You can now add a new Availability Zone of your choice by drag-n-drop it from the left panel:
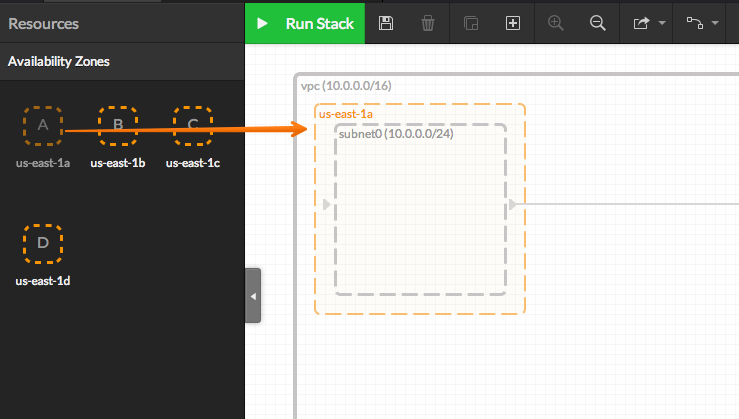
- When adding a new Availability Zone, a default subnet is created.
You can edit the subnet properties in the right panel
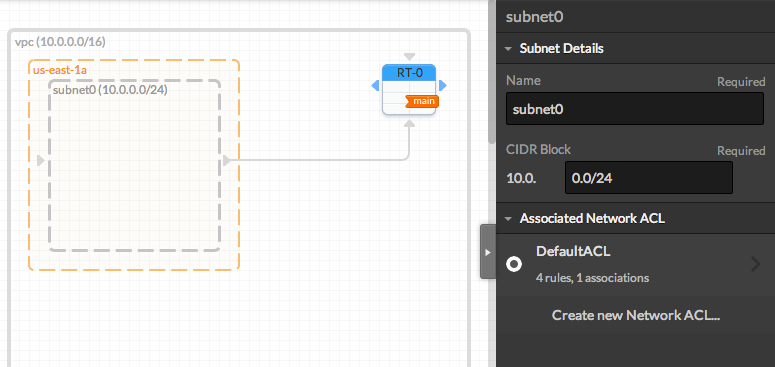
Note that all Subnets are automatically connected to the Main Route Table. Subnets must be connected to only one Route Table. - Add another subnet by dragging it from the resources panel and dropping it in the Availability Zone.
Name one subnet "public" with the CIDR IP "10.0.0.0/24" and the other "private" with the CIDR IP "10.0.1.0/24" as following:
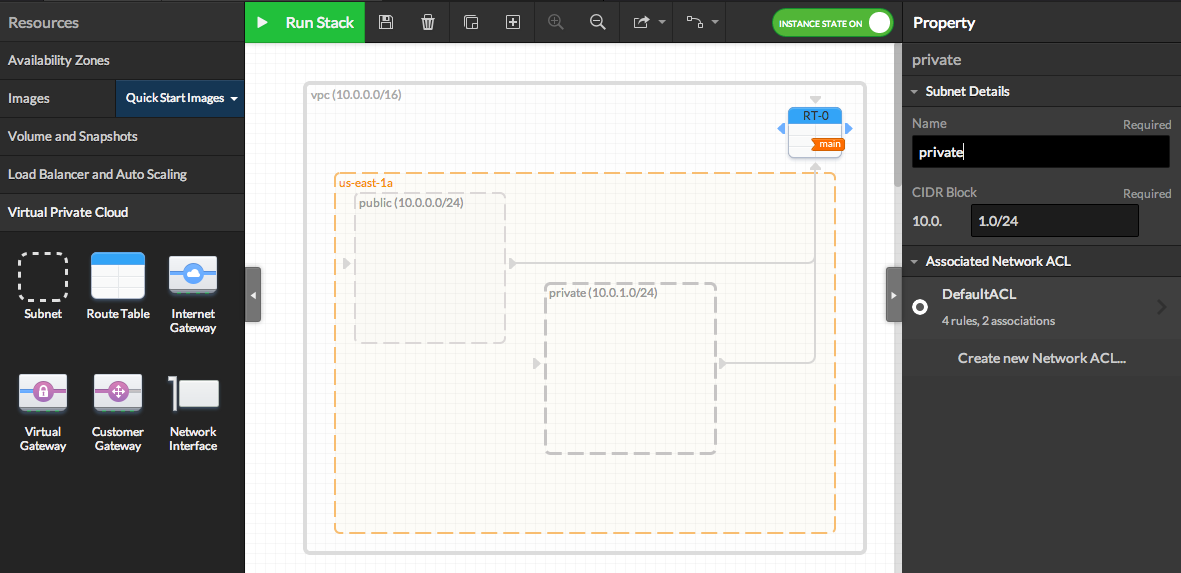
- Add an Internet Gateway and connect it to the Route Table
Drag an IGW from the resource panel (VPC category) to anywhere within the VPC. Note that the IGW will automatically snap to the left edge of the VPC and you can only have one IGW per VPC.
Then, drag from the blue ports on the Route Table to the blue incoming port on the IGW to connect it.
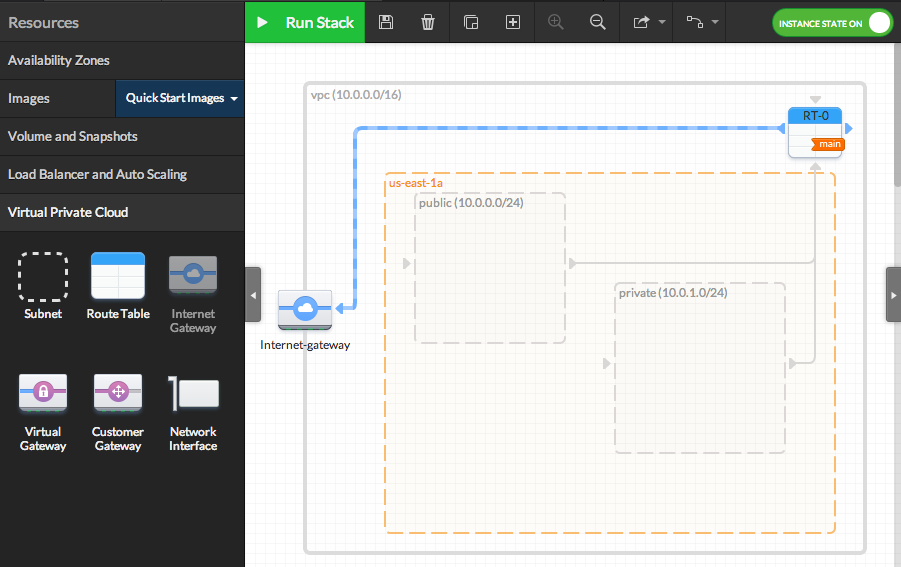
- You can click on the Route Table to define routing rules. Note that when you connect an RT to an IGW we will automatically add a destination "0.0.0.0/0" rule.
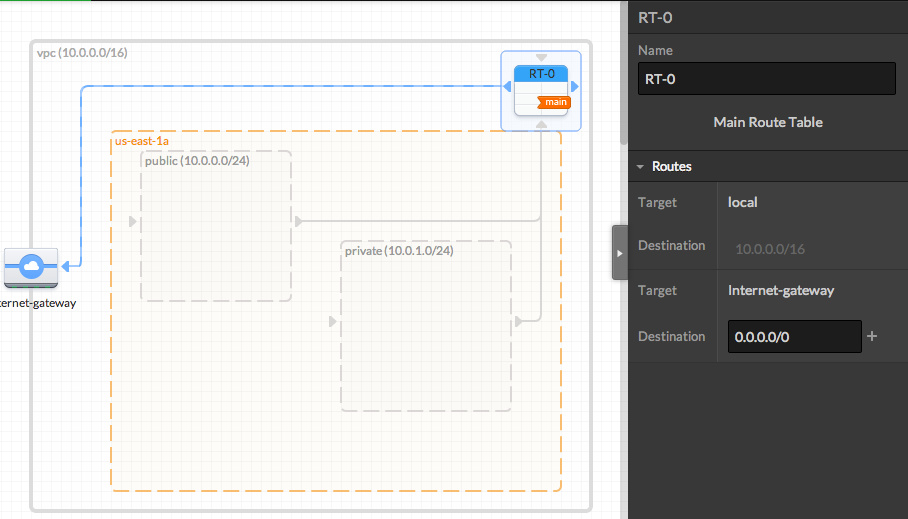
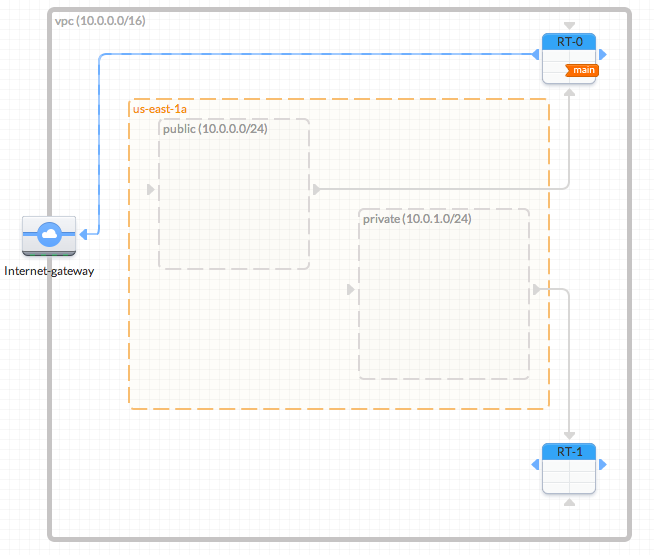
- Add another Route Table
Drag another RT from the resource panel to anywhere in the VPC. We can then associate subnet "private" to this RT by dragging from the grey port on the right of the subnet to an incoming grey port on the RT. Note that, as subnets can only be associated with one RT, the previous association will automatically be removed.
- Add a Virtual Private Gateway and Connect it to the Route Table
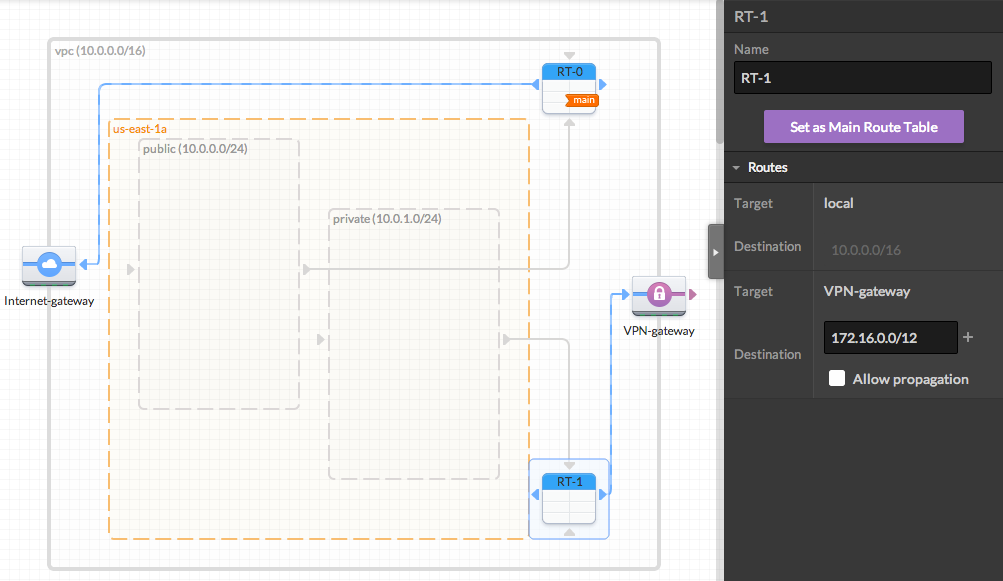
Drag a VGW in to the VPC. Note that it will snap to the right side of the VPC. Once added, connect the left blue port of the VGW to the blue incoming port of the RT associated with the Private subnet. The RT configuration dialogue will automatically appear. Enter the Destination "172.16.0.0/12" in the right panel.
- Add a Customer Gateway
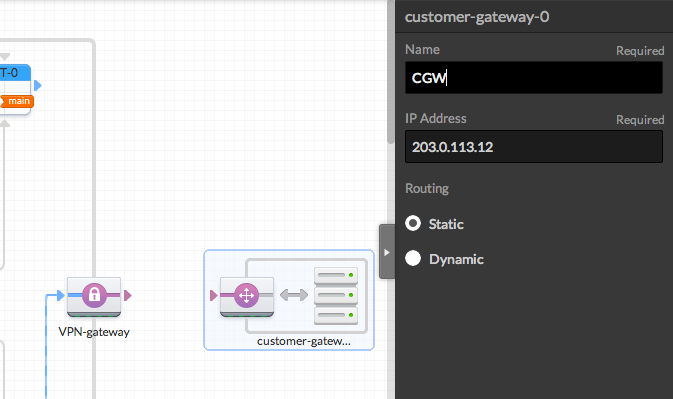
Drag a CGW to the canvas. Note that it must be outside the VPC. After have added the CGW you must enter the IP address of your CGW, e.g., "203.0.113.12". You can rename it as you wish.
- Connect the CGW and VGW with a VPN Connection
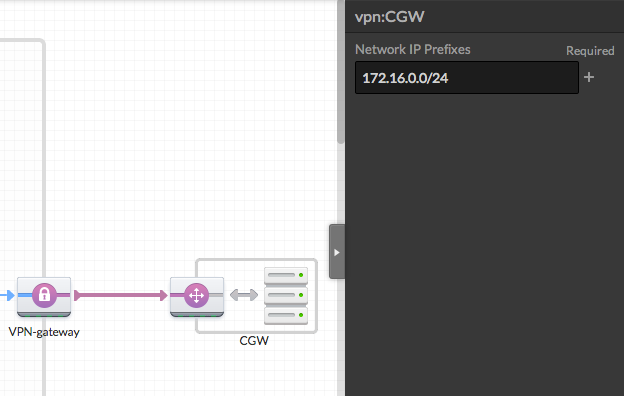
Connect the purple ports of the VGW and CGW to create a VPN. You must enter your VPN CIDR, e.g., "172.16.0.0/24", in the right panel.
- Add AMIs to the Subnets
Drag in some AMIs to the Subnets and rename them.
- Create and Configure Security Groups for each AMI
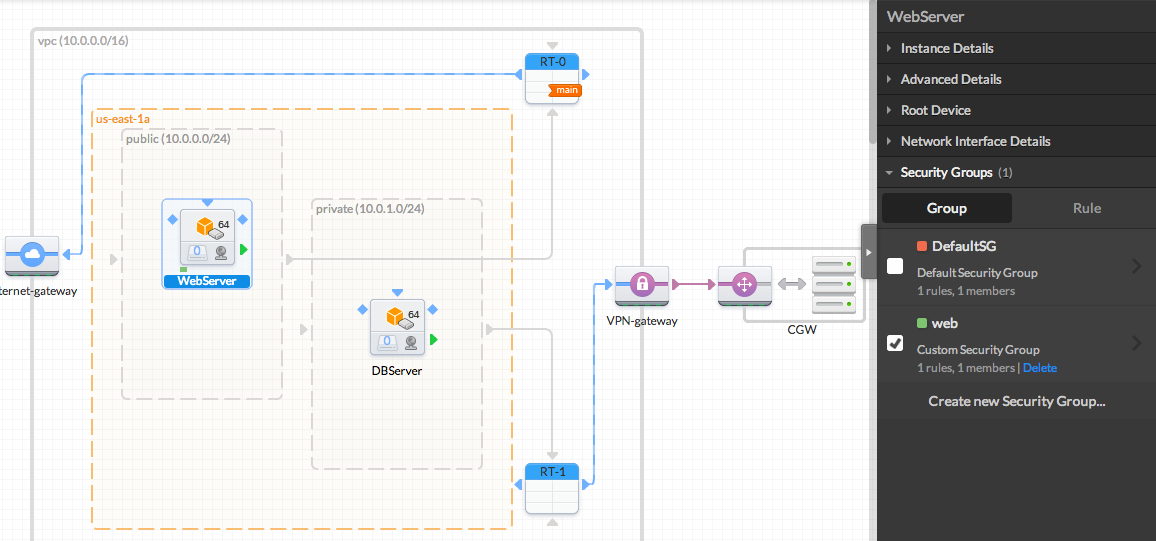
Click an AMI and select "Security Groups" in the right panel. Here you can create a custom SG for each AMI and remove them from "Default SG".
- Connect the AMIs and Configure the Security Groups
You can define the Security Rules in each SG properties.
Define it as follow:SG AMI Security Group Rules In / Out Soure / Dest Protocol Port Range WebServerSG WebServer In 0.0.0.0/0 TCP 80 0.0.0.0/0 TCP 443 Your network’s public IP address range TCP 22 Your network’s public IP address range TCP 3389 Out 0.0.0.0/0 TCP 80 0.0.0.0/0 TCP 443 DBServer.private_ip_address TCP 1433 DBServer.private_ip_address TCP 3306 DBServerSG DBServer In WebServer.private_ip_address TCP 1433 WebServer.private_ip_address TCP 3306 172.16.0.0/24 TCP 22 172.16.0.0/24 TCP 3389 Out 0.0.0.0/0 TCP 80 0.0.0.0/0 TCP 443 - Configure DHCP Options Set
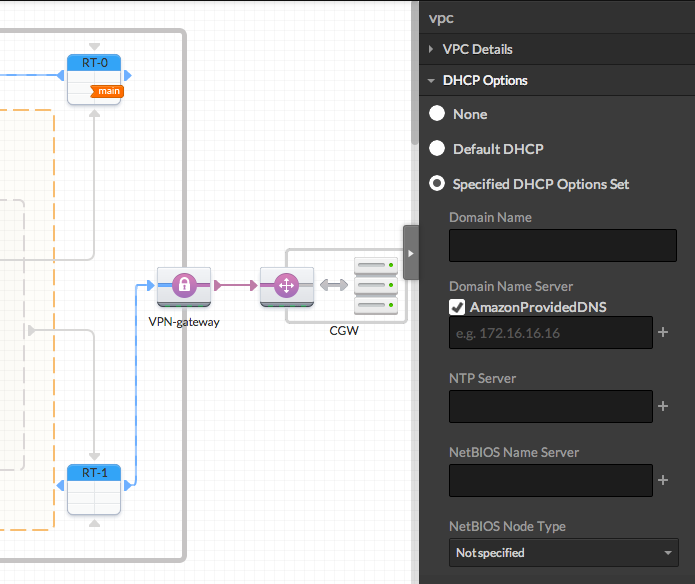
You can edit the VPC properties to configure DHCP in the right panel.
